# 安装 GitLab
极狐 GitLab https://gitlab.cn/ (opens new window)
由于 GitLab 官方的最新政策,中国大陆地区的自部署 GitLab 需要将原 EE Edition 变更为其中国合作伙伴极狐 GitLab:
There will be three distributions of the GitLab product: CE (Community Edition), EE (Enterprise Edition), and JH (JiHu Edition). The CE distribution will continue to be available globally. The EE distribution will only be sold outside China. The JH distribution will only be sold in China.
此次许可变更对原有功能没有影响。
参考文献:
# GitLab 服务器配置要求
CPU 建议至少 4 核。官方说明:CPU配置 (opens new window)
内存建议至少要 4G,建议添加 2G 虚拟内存,并设置 kernel’s swappiness 为 10。官方说明:内存配置 (opens new window)
2022年 4 月 25 日安装 GitLab 版本 14.10,内存占用情况:
本地测试,最小化安装 CentOS 7 1804,只安装了 GitLab 服务。
GitLab 相对其他环境来说挺吃配置的,内存建议至少 8G 以上,越大越好!
[root@localhost ~]# free -h
              total        used        free      shared  buff/cache   available
Mem:           1.8G        1.5G         68M         23M        212M         60M
Swap:          2.0G        2.0G         41M
# 通过上传安装包安装
打开清华大学镜像站:https://mirrors.tuna.tsinghua.edu.cn/gitlab-ce/yum/el7/ (opens new window)
找到【gitlab-ce-12.9.2-ce.0.el7.x86_64.rpm】这个版本,然后点击下载到本机上。
1、安装 GitLab 服务所依赖的包
sudo yum install -y curl policycoreutils-python openssh-server postfix wget
2、安装 GitLab 服务
注意:由于使用的是本地安装,需要把下载好的安装包上传到服务器上!
【gitlab-ce-12.9.2-ce.0.el7.x86_64.rpm】对应的是下载的安装包名字,根据实际情况修改。
sudo yum localinstall -y gitlab-ce-12.9.2-ce.0.el7.x86_64.rpm
3、配置 GitLab 服务,访问域名以及邮箱
vi /etc/gitlab/gitlab.rb

# 修改访问地址,IP 就配置 IP,域名就配置域名,域名也可以通过修改本地 hosts 文件。
external_url 'http://gitlab.yuanke.com'

# 配置邮箱(默认加了注释符 # 记得去掉)
# 可以搜索【### Email Settings】来找
# 启用邮箱
gitlab_rails['gitlab_email_enabled'] = true
# 发送邮箱,把邮箱修改成你要发送的邮箱,要和下面的 smtp_user_name 保持一致
gitlab_rails['gitlab_email_from'] = '530979104@qq.com'
# 发件人名称,显示在邮件中
gitlab_rails['gitlab_email_display_name'] = 'yuanke-gitlab'

# smtp 配置(默认加了注释符 # 记得去掉)
# 可以搜索【### GitLab email server settings】来找
# 启用 smtp 服务
gitlab_rails['smtp_enable'] = true
# smtp 地址
gitlab_rails['smtp_address'] = "smtp.qq.com"
# smtp 端口号
gitlab_rails['smtp_port'] = 465
# smtp 账号,和上面的 gitlab_email_from 保持一致
gitlab_rails['smtp_user_name'] = "530979104@qq.com"
# smtp 密码
gitlab_rails['smtp_password'] = "hqvzmkwywndwbiah"
# smtp 域名
gitlab_rails['smtp_domain'] = "qq.com"
# smtp 认证方式
gitlab_rails['smtp_authentication'] = "login"
# 自动开启 tls
gitlab_rails['smtp_enable_starttls_auto'] = true
# 启用 tls(默认 false,需要手动改成 true)
gitlab_rails['smtp_tls'] = true

# 关闭 smtp 验证 openssl 模式
# 默认前面有个注释符 # 去掉即可
gitlab_rails['smtp_openssl_verify_mode'] = 'none'
初始化 GitLab 配置
注意:初始化这个步骤要等很久,可以先去配置下面的 hosts 文件。
gitlab-ctl reconfigure
gitlab-ctl status
配置完成后,默认会启动 GitLab 服务,可以使用
gitlab-ctl status查看状态。如果没有启动,也可以通过
gitlab-ctl start手动启动,通过gitlab-ctl restart重启。gitlab-ctl stop 停止 GitLab 服务。
访问 GitLab 以及测试 GitLab 邮箱。
修改本机 hosts 文件(C:\Windows\System32\drivers\etc\hosts),做映射处理。
10.1.0.201 gitlab.yuanke.com
开启防火墙 80 端口
firewall-cmd --add-port=80/tcp --permanent
firewall-cmd --reload
浏览器访问页面:gitlab.yuanke.com
第一次打开的时候,需要设置管理员密码(需要八位数以上)。
注意:如果一直提示密码有问题,可以开启【无痕模式】再试试。
密码:root123456
密码规则:
# 8 errors prohibited this user from being saved:
- Email can't be blank
- Password can't be blank
- Namespace route can't be blank
- Namespace name can't be blank
- Name can't be blank
- Notification email can't be blank
- Username can't be blank
- Username can contain only letters, digits, '_', '-' and '.'. Cannot start with '-' or end in '.', '.git' or '.atom'.
用户名默认是:root
密码是刚才设置的密码:root123456
参考文献:
【云知梦】企业级私库Gitlab入门和实战_哔哩哔哩_bilibili (opens new window)
gitlab配置SMTP方式发送邮件_gnail_oug的博客-CSDN博客_gitlab smtp (opens new window)
# 通过 RPM 安装
打开 GitLab 官网:https://about.gitlab.com/install/ (opens new window)
向下翻找到不同系统的安装方法,如图所示:
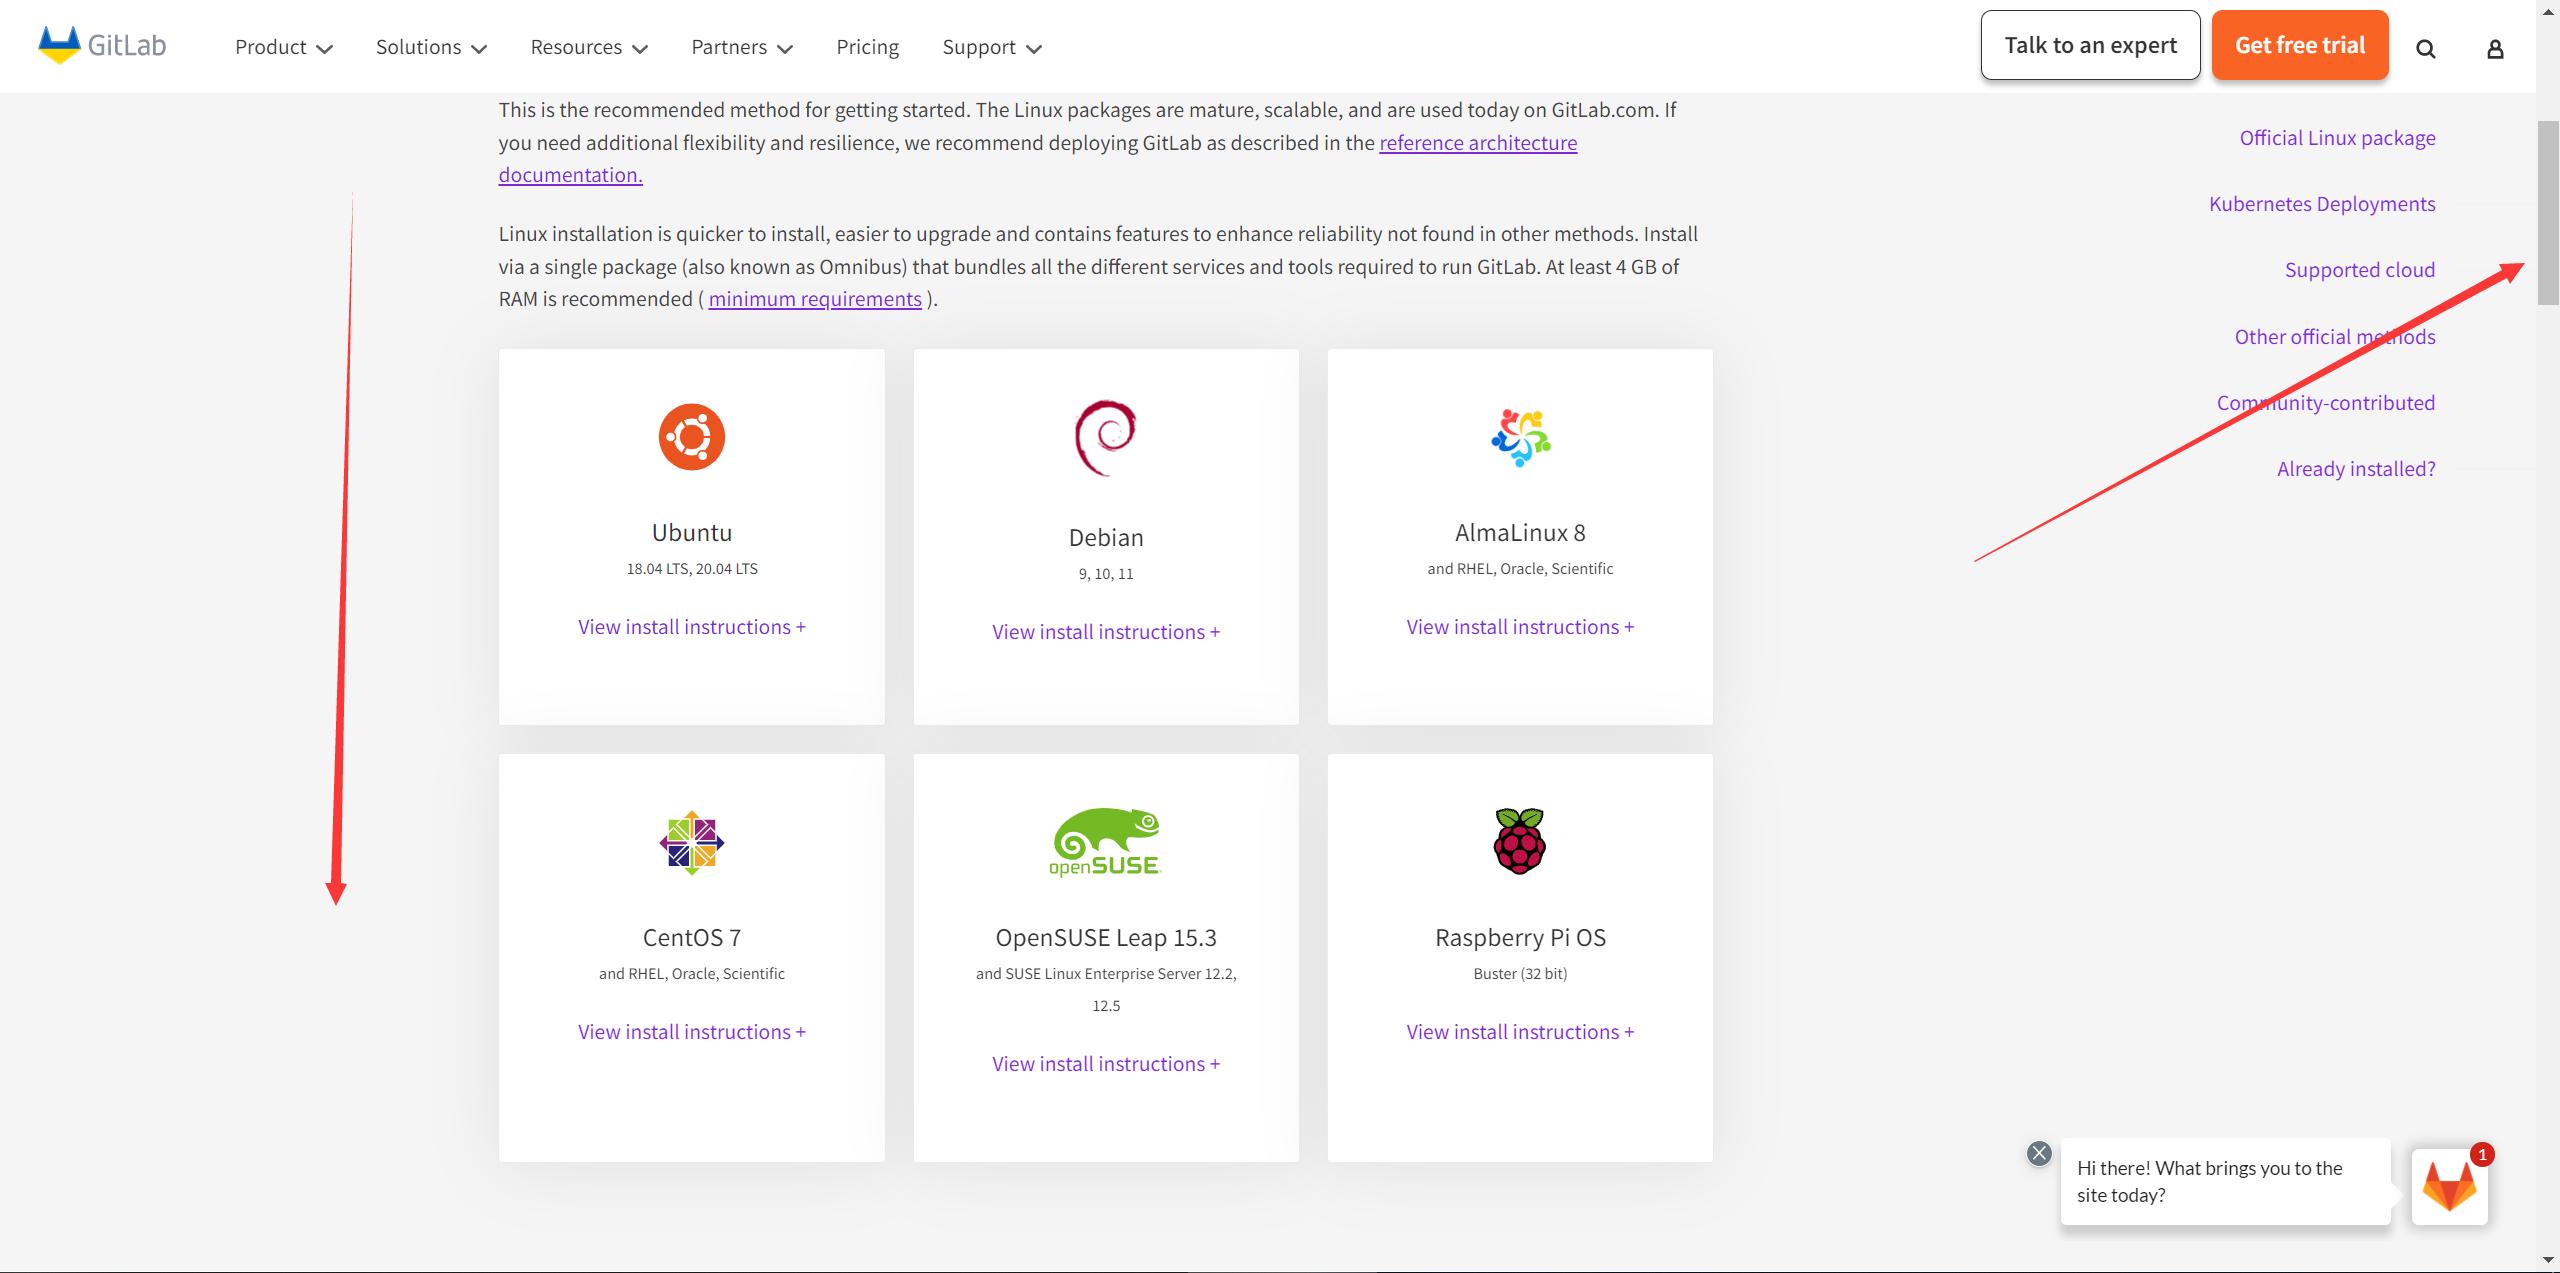
这里以 CentOS 7 为例。
具体命令如下
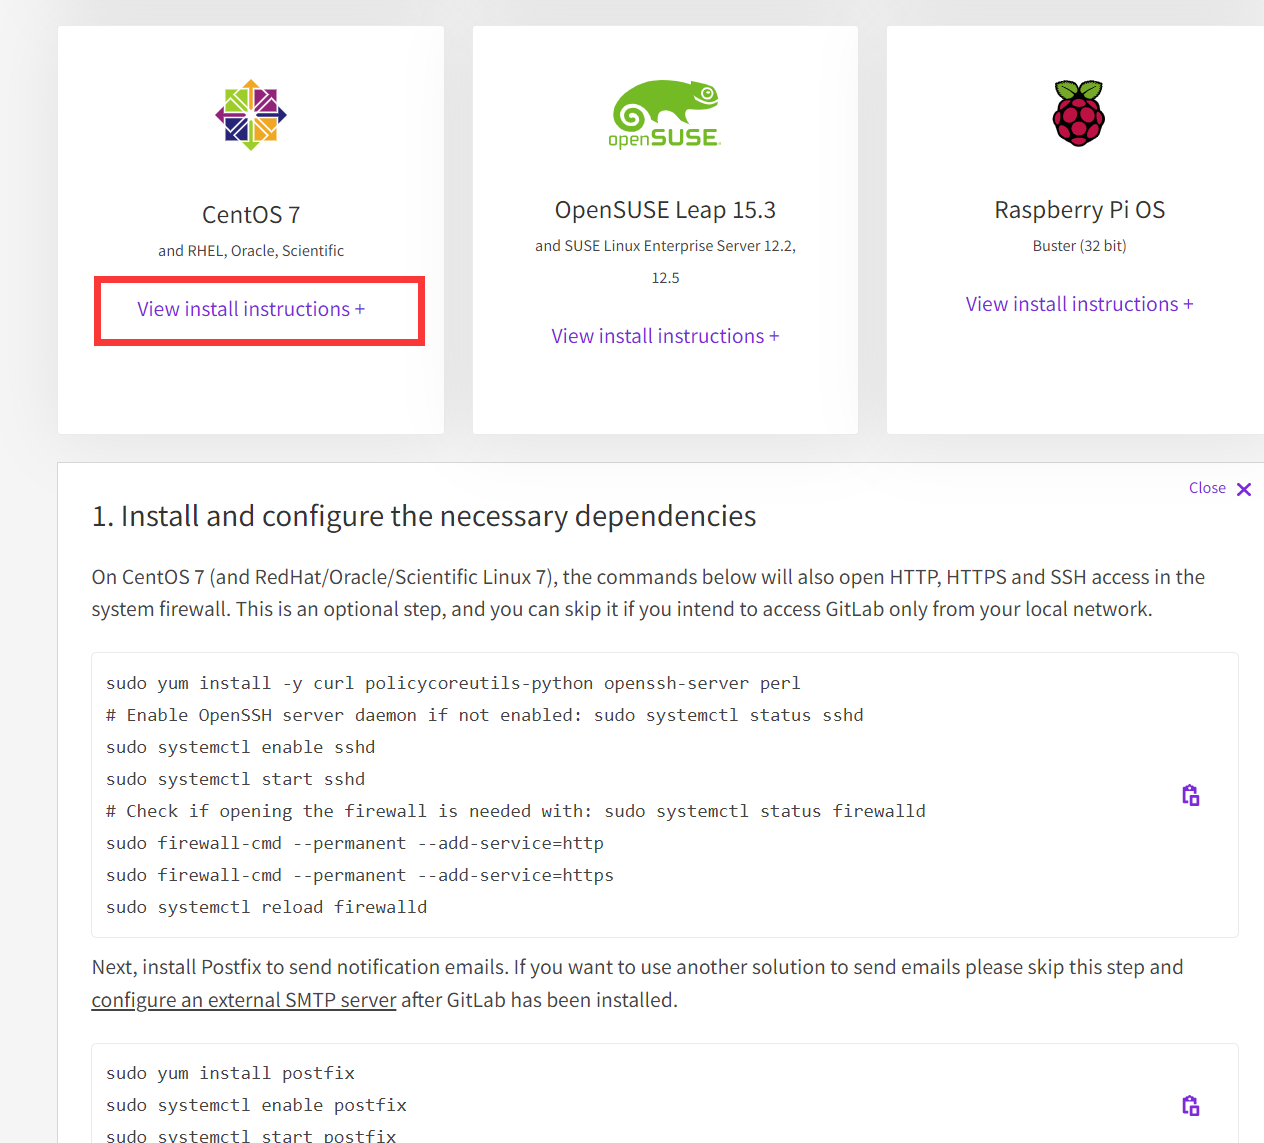
# 安装必要的依赖
在 CentOS 7(以及 RedHat/Oracle/Scientific Linux 7),以下命令会同时开启 HTTP, HTTPS 和 SSH 在防火墙中的访问。
如果你只想在局域网内部使用,这步是可选的。
sudo yum install -y curl policycoreutils-python openssh-server perl
# Enable OpenSSH server daemon if not enabled: sudo systemctl status sshd
sudo systemctl enable sshd
sudo systemctl start sshd

# Check if opening the firewall is needed with: sudo systemctl status firewalld
sudo firewall-cmd --permanent --add-service=http
sudo firewall-cmd --permanent --add-service=https
sudo systemctl reload firewalld
接下来,安装 Postfix 来发送邮件。如果你想使用另外一种方案来发送邮件,可以跳过这个步骤,然后在安装完成 GitLab 以后配置外部的 SMTP 服务器来发送邮件。
配置外部 SMTP 服务器:https://docs.gitlab.com/omnibus/settings/smtp.html (opens new window)
sudo yum install postfix
sudo systemctl enable postfix
sudo systemctl start postfix
在安装的过程中会出现
Is this ok [y/d/N]: y,输入 y 确认安装即可。
# 添加 GitLab 包仓库和安装 GitLab 包
添加 GitLab 包仓库
curl https://packages.gitlab.com/install/repositories/gitlab/gitlab-ee/script.rpm.sh | sudo bash
接下来,安装 GitLab 包。确保你已经配置好 DNS 域名,配置网址:https://docs.gitlab.com/omnibus/settings/dns.html (opens new window),然后把 https://gitlab.example.com 改成你访问 GitLab 的地址。安装包会自动配置然后使用这个地址来启动 GitLab。
如果使用 https://,GitLab 会自动要求 Let's Encrypt 证书 (opens new window),这要求绑定好 DNS 域名。你也可以使用自己的证书或者直接使用 http:// (没有 s)。
如果你想自定义一个密码作为初始的管理员用户 root 的密码,参考文档:https://docs.gitlab.com/omnibus/installation/index.html#set-up-the-initial-password (opens new window)
如果没有指定密码,会随机生成一个密码。
# 注意:需要把 https://gitlab.example.com 换成服务器的 IP/域名
# 比如,服务器 IP 地址为 192.168.202.251
# 把 https://gitlab.example.com 换成 http://192.168.202.251
# 注意,http 和 https 的区别!
sudo EXTERNAL_URL="https://gitlab.example.com" yum install -y gitlab-ee
# 登录 GitLab
打开 GitLab 网址(和安装时设置的 EXTERNAL_URL 一样):http://192.168.202.251/
除非在安装的时候提供了一个自定义的密码,否则会随机产生一个密码,存放在 /etc/gitlab/initial_root_password。把这个作为用户名 root 密码去登陆。
cat /etc/gitlab/initial_root_password
这个文件在 24 小时之后会自动删除,所以需要及时记下 GitLab 的 root 密码!

# 设置邮箱接收 GitLab 官方的通知(可选)
通过 https://about.gitlab.com/company/preference-center/ (opens new window) 订阅 GitLab 官方通知,当 GitLab 更新了新的特性、文档,或者一些更新、漏洞的时候会自动发邮件通知你。
# 安装完成之后的推荐步骤
在完成 GitLab 的安装之后,可以参考 https://docs.gitlab.com/ee/install/next_steps.html (opens new window) 考虑进一步配置安全设置和注册限制。
# 关闭 GitLab
使用 gitlab-ctl 管理 GitLab。
关闭命令如下:
gitlab-ctl stop
执行日志:
[root@localhost ~]# gitlab-ctl stop
ok: down: alertmanager: 1s, normally up
ok: down: gitaly: 0s, normally up
ok: down: gitlab-exporter: 1s, normally up
ok: down: gitlab-kas: 0s, normally up
ok: down: gitlab-workhorse: 1s, normally up
ok: down: grafana: 0s, normally up
ok: down: logrotate: 1s, normally up
ok: down: nginx: 0s, normally up
ok: down: node-exporter: 0s, normally up
ok: down: postgres-exporter: 1s, normally up
ok: down: postgresql: 0s, normally up
ok: down: prometheus: 1s, normally up
ok: down: puma: 0s, normally up
ok: down: redis: 0s, normally up
ok: down: redis-exporter: 0s, normally up
ok: down: sidekiq: 0s, normally up
# 启动 GitLab
sudo gitlab-ctl start
# 重启 GitLab
sudo gitlab-ctl restart
# 通过 Docker 安装
# 通过宝塔面板安装
参考资料: