# 安装 Redis
# Windows 系统上安装 Redis
由于 Redis 官方没有针对 Windows 系统开发 Redis,所以 Redis 都是由其他热心人士使用 Redis 的开源代码制作而成的。
目前使用较多的是 tporadowski 作者的制作的 redis:https://github.com/tporadowski/redis/releases (opens new window)
# 安装方式一:压缩包解压
下载 .zip 结尾的压缩包,放到 D:/tools 目录下,解压到 D:/tools/redis
# 注册为 Windows 服务,开机自启
上面虽然启动了 Redis,但是只要一关闭 cmd 窗口,Redis 就会关闭。所以要把 Redis 设置成 Windows 下的服务。
也就是设置到这里,首先发现是没有这个 Redis 服务的。
# 新增/安装服务
redis-server --service-install redis.windows-service.conf
输入命令之后没有报错,表示成功了,刷新服务,会看到多了一个redis服务。
# 开启服务
redis-server --service-start
# 停止服务
redis-server --service-stop
# 卸载服务(需要先停止服务)
redis-server --service-uninstall
# 安装方式二:msi 安装
下载 .msi 结尾的安装包,下载完成后双击安装即可。
参考资料:
# Linux 系统上安装 Redis
# Linux 系统一键安装 Redis 脚本
推荐安装版本:6.2.7
注意:Windows 系统上最高的稳定版本只有 5.0.14,所以后期可能会迁移到 Windows Server 的不要用 5 以上的,防止日后迁移出现不兼容问题!
自动化脚本已测试 Redis 版本:
Redis 6:6.2.6、6.2.7
Redis 5:5.0.9、5.0.14
# 下载 Redis 安装包
# 获取其他 Redis 版本:https://download.redis.io/releases/
redis_version=6.2.6
# Redis 安装目录,不需要提前创建
install_dir=/usr/local/redis
cd /usr/local/src
yum -y install wget && wget https://download.redis.io/releases/redis-${redis_version}.tar.gz
# 解压 Redis 安装包
tar -zxvf redis-${redis_version}.tar.gz
# 安装编译 Redis 所需要的依赖
yum -y install gcc
# 编译安装 Redis
cd redis-${redis_version}
make
make install PREFIX=${install_dir}
cp -a redis.conf ${install_dir}/bin
cd ${install_dir}/bin
# 修改 Redis 配置文件
cp -a redis.conf redis.conf.bak
# 以后台方式启动 Redis
# 这个命令会导致 redis 没有输出日志,已通过启动命令在后台方式启动,不需要用这个
# sed -i 's/daemonize no/daemonize yes/' redis.conf
# 每条命令都追加进日志文件中,方便数据恢复
sed -i 's/appendonly no/appendonly yes/' redis.conf
# 开放 Redis 远程访问
sed -i 's/bind 127.0.0.1/# bind 127.0.0.1/g' redis.conf
# 设置 Redis 密码,注意 Redis 运算速度非常快,密码长度至少使用 28 位及以上,防止被暴力破解!
# 随机密码生成器,生成密码时不要包含特殊字符 !$&%,并且建议以字母开头,https://suijimimashengcheng.bmcx.com/
# 这里设置的新密码是 twvZc7hbjAq3BSsRpYtPUf5vc758
# 使用 sed 命令生成密码时不要包含特殊字符 !$&%
sed -i 's/# requirepass foobared/requirepass twvZc7hbjAq3BSsRpYtPUf5vc758/' redis.conf
# 添加环境变量
echo 'export REDIS_HOME=/usr/local/redis' >> /etc/profile
echo 'export PATH=$REDIS_HOME/bin:$PATH' >> /etc/profile
source /etc/profile

# 添加 Redis 启动脚本、停止脚本
# 启动脚本
echo '#!/bin/bash' > ${install_dir}/start.sh
echo "cd ${install_dir}/bin" > ${install_dir}/start.sh
echo "nohup ./redis-server redis.conf > ${install_dir}/redis.log 2>&1 &" >> ${install_dir}/start.sh

# 停止脚本
echo '#!/bin/bash' > ${install_dir}/shutdown.sh
echo "cd ${install_dir}/bin" > ${install_dir}/shutdown.sh
# 把这里的 twvZc7hbjAq3BSsRpYtPUf5vc758 修改成你自己的 Redis 密码,密码要和上面的一致!
echo "./redis-cli -p 6379 -a twvZc7hbjAq3BSsRpYtPUf5vc758 shutdown" >> ${install_dir}/shutdown.sh


# 给脚本添加执行权限
chmod +x ${install_dir}/start.sh
chmod +x ${install_dir}/shutdown.sh

# 防火墙放行 6379 端口
firewall-cmd --add-port=6379/tcp --permanent
firewall-cmd --reload
# 启动 Redis
bash ${install_dir}/start.sh
# 设置 Redis 开机自启
echo "bash ${install_dir}/start.sh" >> /etc/rc.local
chmod +x /etc/rc.d/rc.local
# 下载 Redis 安装包
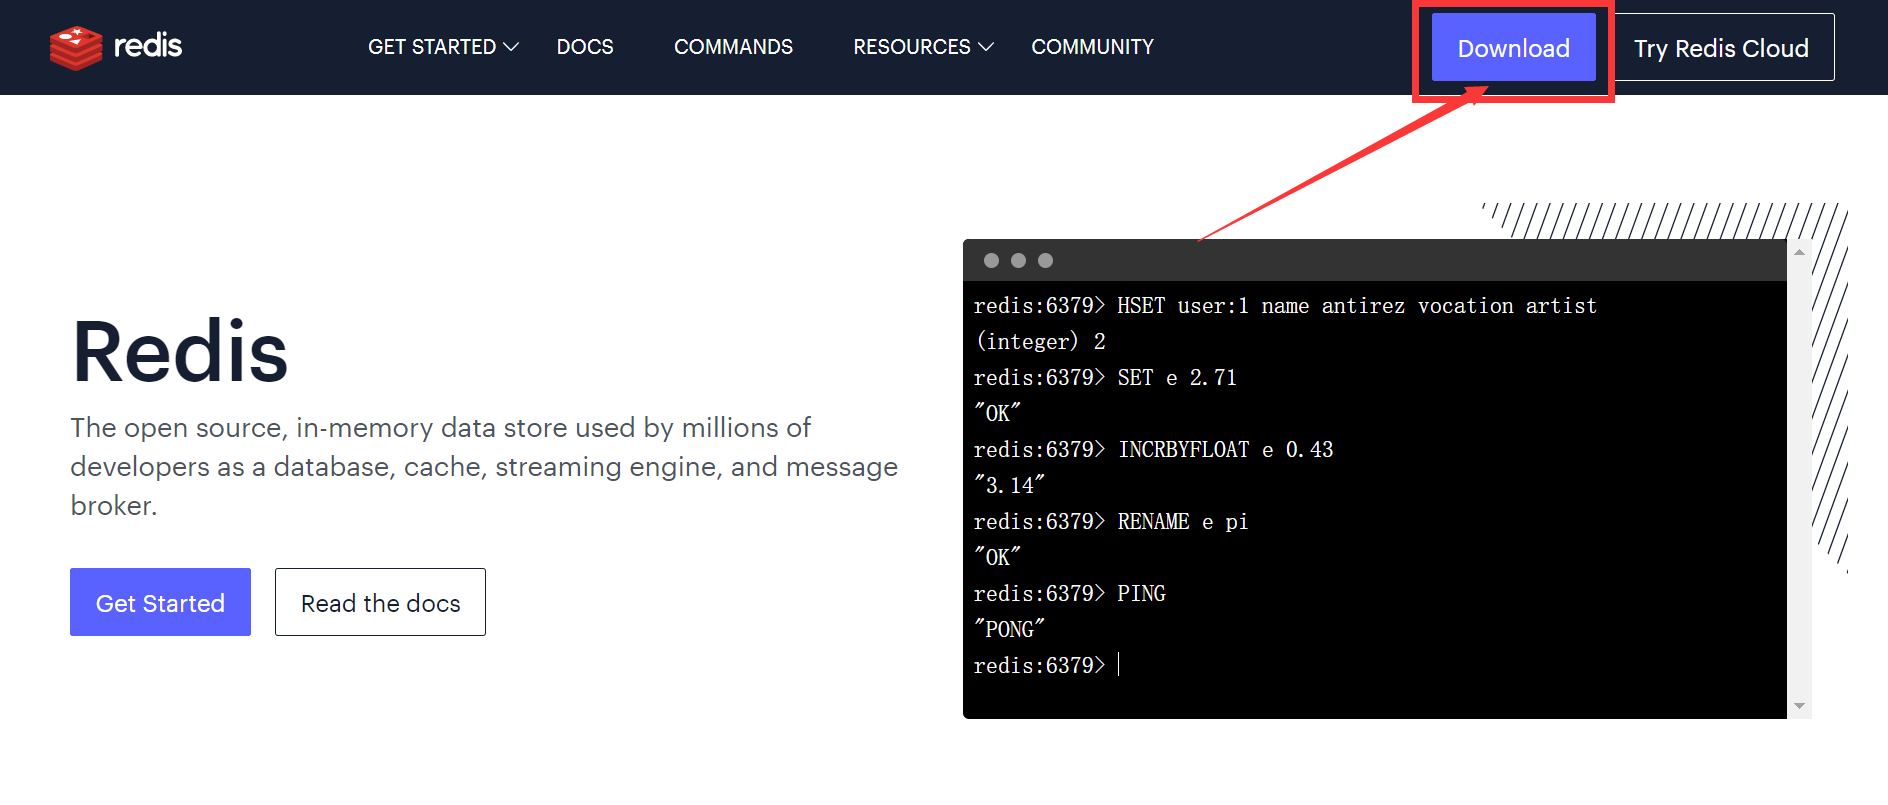
打开 Redis 官网:https://redis.io/ (opens new window),点击右上角的 Download,或者直接访问:https://redis.io/download/ (opens new window)
点击左边的 Download 6.2.6 sources 下载 Redis 最新稳定版本的源代码。

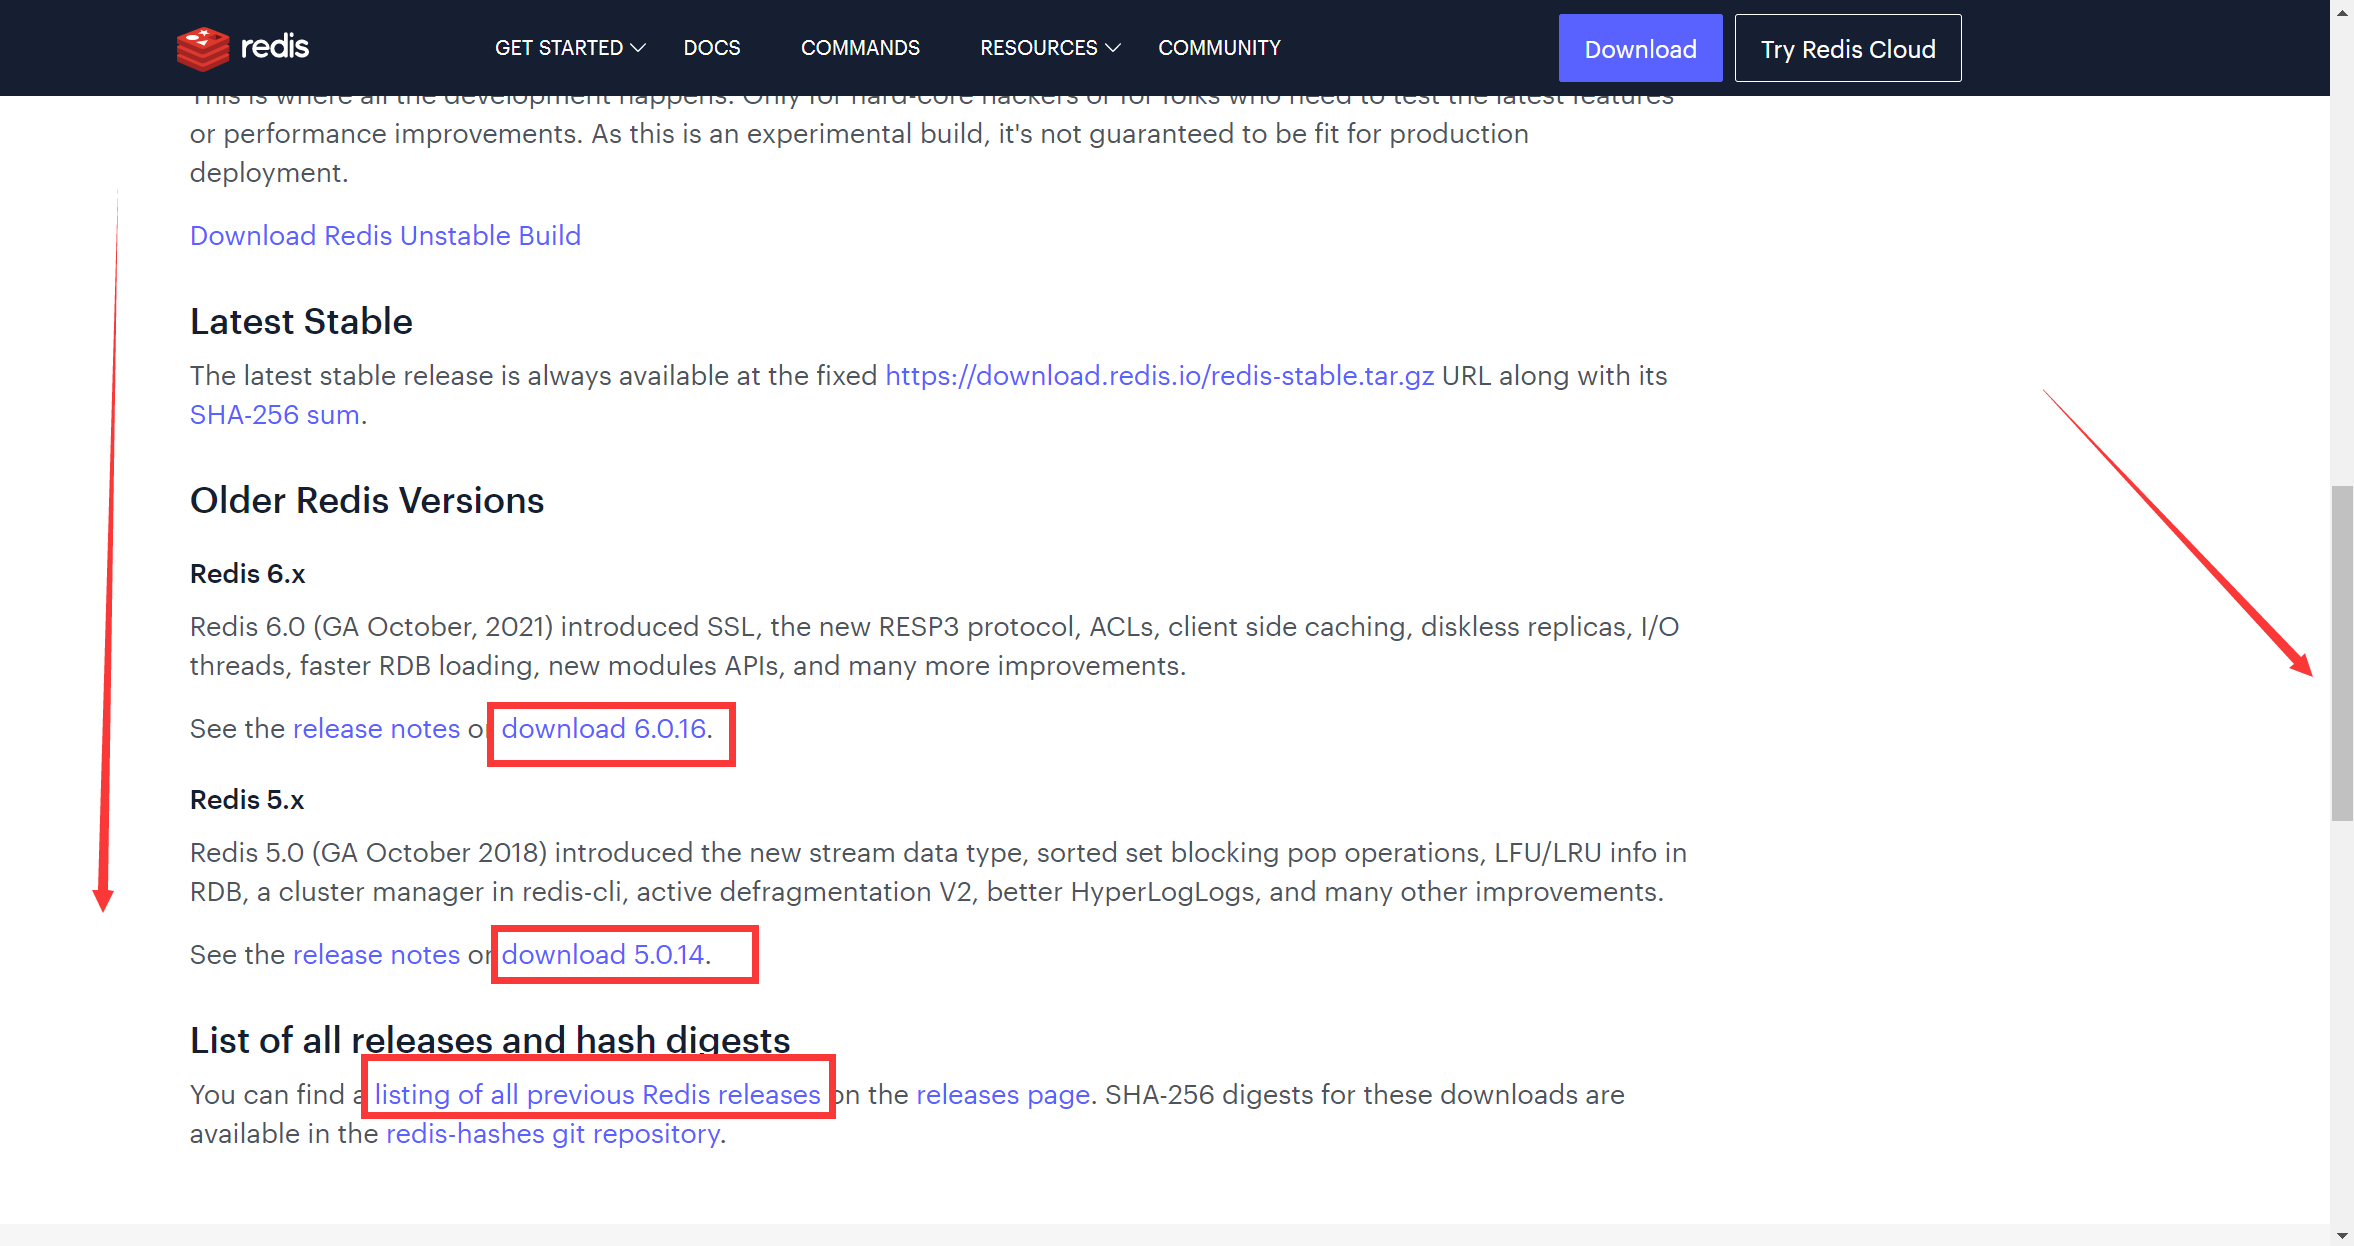
你也可以向下滚动,下载 Redis 以前的版本。点击 listing of all previous Redis releases,查看并下载 Redis 所有历史版本:https://download.redis.io/releases/ (opens new window)
# 上传 Redis 安装包
使用 xftp 连接至服务器,跳转到 /usr/local/src 目录下并上传安装包,或者直接在服务器上下载安装包。
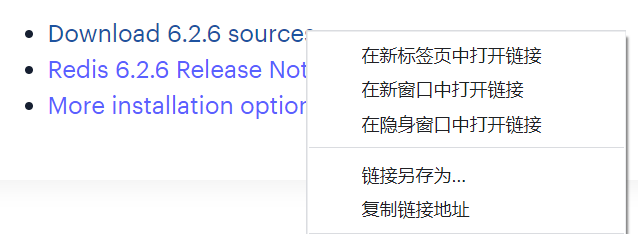
右键链接,点击复制链接地址,即可获取安装包链接。
在服务器下载 Redis 安装包:
yum -y install wget && wget -P /usr/local/src https://download.redis.io/releases/redis-6.2.6.tar.gz
# 解压 Redis 压缩包
把 redis-6.2.6.tar.gz 换成下载的文件名
cd /usr/local/src
tar -zxvf redis-6.2.6.tar.gz
# 安装编译 Redis 所需要的依赖
由于 Redis 是由 C 语言编写的,它的运行需要 C 环境,因此我们需要先安装 gcc。安装命令如下:
yum -y install gcc
# 编译安装 Redis
把 redis-6.2.6 换成解压出来的目录名
cd redis-6.2.6
make
make install PREFIX=/usr/local/redis
cp -a redis.conf /usr/local/redis/bin
常见错误一:
/bin/sh: cc: 未找到命令原因分析:缺少 gcc 依赖,需要先下载编译所需要的依赖:
yum -y install gcc[root@localhost redis-6.2.6]# make cd src && make all make[1]: 进入目录“/usr/local/src/redis-6.2.6/src” CC Makefile.dep make[1]: 离开目录“/usr/local/src/redis-6.2.6/src” make[1]: 进入目录“/usr/local/src/redis-6.2.6/src” CC adlist.o /bin/sh: cc: 未找到命令 make[1]: *** [adlist.o] 错误 127 make[1]: 离开目录“/usr/local/src/redis-6.2.6/src” make: *** [all] 错误 2常见错误二:
zmalloc.h:50:31: 致命错误:jemalloc/jemalloc.h:没有那个文件或目录原因分析:没有使用
make MALLOC=libc,而是使用了make解决方案:使用
make MALLOC=libc代替make具体原因参考:https://blog.csdn.net/bugall/article/details/45914867 (opens new window)
# 修改 Redis 配置文件
先备份原来的配置文件,在进行修改!
cp -a redis.conf redis.conf.bak
修改配置文件
vi redis.conf
# 在后台进程运行 Redis
找到 daemonize no,改成 daemonize yes
/daemonize no
# 允许 Redis 远程访问
找到 bind 127.0.0.1 这行注释掉,这里的 bind 指的是只有指定的网段才能远程访问这个 redis,注释掉后,就没有这个限制了。
/bind 127.0.0.1
改成如图所示的样子:

关于 protected-mode 的说明:
当 protected-mode 为 on 的时候,如果没有设置密码,并且 bind 注释掉了(允许所有连接),则拒绝外部连接(因为没设置密码又允许所有的连接,基于安全考虑,因此,在互联网环境下,禁止打开此模式!!!)
protected-mode 设置成 no(默认是设置成 yes 的, 防止了没有设置密码情况下的远程访问,在 Redis 3.2.3 版本后启用)
注意:当且仅当在测试环境情况下,为了方便局域网内测试,不设置密码又想给局域网内使用,才能修改此设置!!!
/protected-mode yes官方在注释中的说明:
# Protected mode is a layer of security protection, in order to avoid that
# Redis instances left open on the internet are accessed and exploited.
#
# When protected mode is on and if:
#
# 1) The server is not binding explicitly to a set of addresses using the
#    "bind" directive.
# 2) No password is configured.
#
# The server only accepts connections from clients connecting from the
# IPv4 and IPv6 loopback addresses 127.0.0.1 and ::1, and from Unix domain
# sockets.
#
# By default protected mode is enabled. You should disable it only if
# you are sure you want clients from other hosts to connect to Redis
# even if no authentication is configured, nor a specific set of interfaces
# are explicitly listed using the "bind" directive.
# 添加 Redis 密码
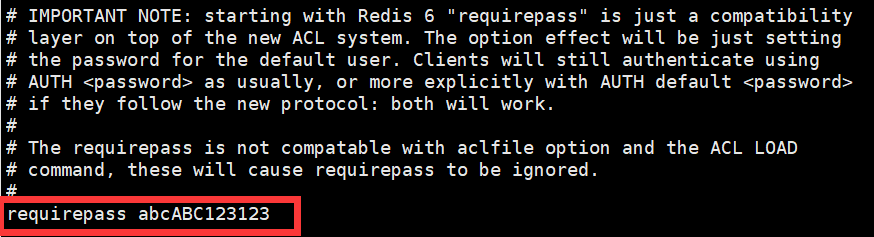
找到 # requirepass foobared 这行,
把 foobared 改成你要设置的密码,然后去掉前面的 # 注释符。
/# requirepass foobared
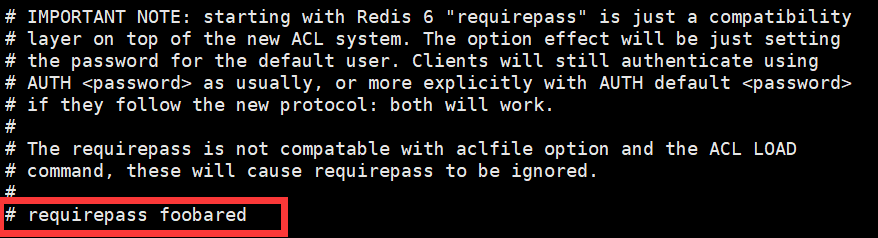
把 # 标识符去掉,这里设置的密码为 abcABC123123
注意!Redis 基于内存运行速度非常快,每秒可以进行权限认证 9W 次,密码长度至少要在 30 位以上!
随机生成密码网站:https://suijimimashengcheng.bmcx.com/ (opens new window)
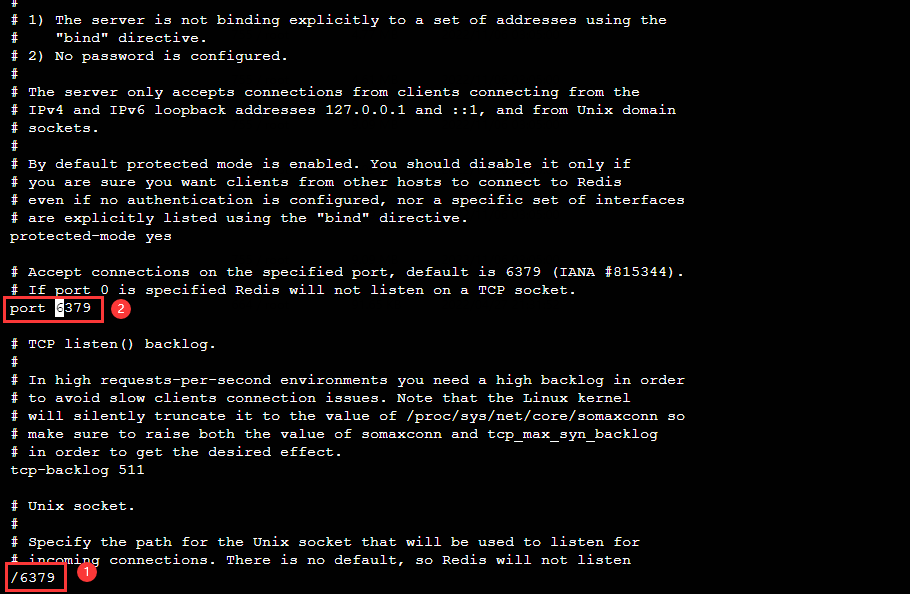
# 修改 Redis 默认端口号 6379
搜索【/6379】
# Redis 持久化配置
# 打开 appendonly
输入以下命令查找,修改为 yes
/appendonly no

# 每秒保存一次
新版已经默认是每秒保存一次了,检查一下。
/appendfsync

参考文献:
# 添加环境变量
echo 'export REDIS_HOME=/usr/local/redis' >> /etc/profile
echo 'export PATH=$REDIS_HOME/bin:$PATH' >> /etc/profile
source /etc/profile
# 添加 Redis 启动脚本、停止脚本
需要先配置环境变量!
# 启动脚本
echo '#!/bin/bash' > /usr/local/redis/start.sh
echo '/usr/local/redis/bin/redis-server /usr/local/redis/bin/redis.conf > /usr/local/redis/6379.log 2>&1' >> /usr/local/redis/start.sh

# 停止脚本
echo '#!/bin/bash' > /usr/local/redis/shutdown.sh
# 把【123456】改为你设置的密码
echo '/usr/local/redis/bin/redis-cli -h 127.0.0.1 -p 6379 -a 123456 shutdown' >> /usr/local/redis/shutdown.sh
备注:
这里的 redis-server 必须使用绝对路径,因为如果添加开机自启的话,执行开机启动命令的时候还没有加载用户的环境变量,导致直接使用 redis-server 会报找不到命令的错误!
参考文献:
Redis服务启动和停止(NOAUTH Authentication required) (opens new window)
# 防火墙放行 6379 端口
firewall-cmd --add-port=6379/tcp --permanent
firewall-cmd --reload
# 启动 Redis
bash /usr/local/redis/start.sh
或者:
./redis-server redis.conf
# 停止 Redis
bash /usr/local/redis/shutdown.sh
如果设置了密码,需要先进行使用
redis-cli连接,然后再用命令auth xxx,进行密码权限校验,才可以执行 shutdown 命令关闭 Redis。
# 设置 Redis 开机自启
echo 'bash /usr/local/redis/start.sh' >> /etc/rc.local
设置执行权限,确保脚本会在开机的时候会执行。
chmod +x /etc/rc.d/rc.local
参考资料: